In this lesson we will learn basic commands but before we go to any command lets learn how to start terminal and basic syntax of the command.

Command Syntex

All command follow similar syntax as follow

command [options] and then <arguments>

  • Command is name of any command like ls, echo etc
  • Options are used to modify output like add more details to output of filter output etc
  • Arguments nothing but the input along with options like filename or directory

You can combine many options but remeber if any of the option needs the parameter then it must be specified immediately after the option.

Starting the Terminal

To start the terminal you can go to applications menu and launch the terminal.

You can also use Ctrl + Alt + t to start terminal

Once you start the terminal you will get user prompt like shown below

1
dbit@Tayyabali:~$ 

Lets understand the meaning of above output

  • dbit is nothing but user name
  • @Tayyabali is name of the computer
  • ~ is working directory of the user which is home currently.
  • $ is indicating its a normal user session if you switch to the root user it will change to #

Please note you can start many terminals or can have multiple tabs in the one terminal

echo Command

echo command is used to display text on screen.

Lets run following commands and see how we can use echo

1
2
dbit@Tayyabali:~$ echo hi
hi

We can see echo just displayed whatever we passed to it. We have not used any options but given the argument as hi

Lets use quotes to display

1
2
bit@Tayyabali:~$ echo "Hello"
Hello

We can also use the single quotes as shown below

1
2
dbit@Tayyabali:~$ echo 'Hello'
Hello

echo is also used to display the values of the variables. Lets use echo without quotes, with single quotes and with double quotes and observer the output

1
2
3
4
5
6
7
8
9
dbit@Tayyabali:~$ count=10
dbit@Tayyabali:~$ echo count
count
dbit@Tayyabali:~$ echo $count
10
dbit@Tayyabali:~$ echo "$count"
10
dbit@Tayyabali:~$ echo '$count'
$count

In above example

  • We define variable using count=10
  • echo without $ and displays count
  • echo with $ will display value of count as 10
  • echo with duoble quotes does the same thing like without
  • When we use single quotes it doesnt substitute the variable value

Following example show echo used to display the files from directory

1
2
dbit@Tayyabali:~/demoGit$ echo * 
file1 file2 file3 d.txt iamignored.txt README.md

With the help of -e option we can pass backslash escapes to modify the output as following

 1
 2
 3
 4
 5
 6
 7
 8
 9
10
11
12
13
14
15
16
17
18
dbit@Tayyabali:~/demoGit$ echo -e "Hello \v Good Evening \v How are you  "
Hello 
       Good Evening 
                     How are you  


dbit@Tayyabali:~/demoGit$ echo -e "Hello \t Good Evening \t How are you  "
Hello 	 Good Evening 	 How are you  


dbit@Tayyabali:~/demoGit$ echo -e "Hello \n Good Evening \n How are you  "
Hello 
 Good Evening 
 How are you


 dbit@Tayyabali:~/demoGit$ echo -e "Hello \\ Good Evening \\ How are you  "
Hello \ Good Evening \ How are you
  • use \v to put virticle tab
  • \t to put tab
  • \n new line
  • \ backslash

Fun with command line

You can install some of the command line output formatting tools like cowsay, figlet etc and decorate the output in very unique and fun way.

Install these tools on ubuntu using following commands

1
2
3
4
$ sudo apt install cowsay
$ sudo apt install fortune
$ sudo apt install figlet
$ sudo apt install lolcat

You can then try following examples and try with different options and arguments

1
2
3
4
5
6
7
8
9
dbit@Tayyabali:~$ cowsay Hello
 _______
< Hello >
 -------
        \   ^__^
         \  (oo)\_______
            (__)\       )\/\
                ||----w |
                ||     ||

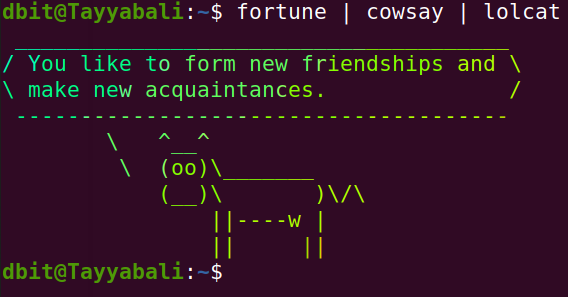
Cowsay basically generates an ASCII picture of a cow saying something provided by the user as shown above.

1
2
3
4
5
6
7
8
dbit@Tayyabali:~$ fortune 
Q:	Why is Christmas just like a day at the office?
A:	You do all of the work and the fat guy in the suit
	gets all the credit.

dbit@Tayyabali:~$ fortune 
Tempt not a desperate man.
		-- William Shakespeare, "Romeo and Juliet"

fortune will basically give you anything random text from the files , which is fun and interesting to read

1
2
3
4
5
6
dbit@Tayyabali:~$ figlet DBIT
 ____  ____ ___ _____ 
|  _ \| __ )_ _|_   _|
| | | |  _ \| |  | |  
| |_| | |_) | |  | |  
|____/|____/___| |_|  

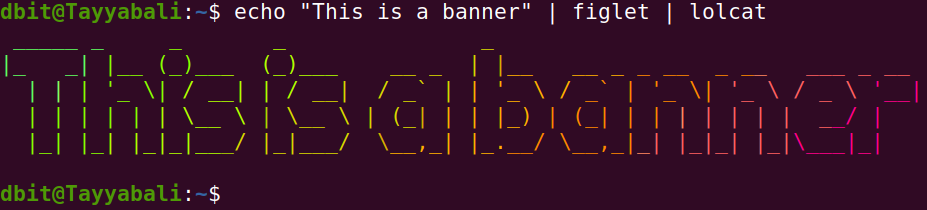
Figlet will display the given text into large text which is made out of other screen characters.

1
2
echo Hello | lolcat 
Hello

lolcat will display the text in rainbow colors.

Here in the above example we are passing the output of the echo command to the lolcat to display in rainbow colors. |

You can try following examples on your linux system and observer the outputs and play around it.

1
$ echo "This is a banner" | figlet | lolcat

Banner

1
$ fortune | cowsay | lolcat

Fortune

1
$ echo "Nice way to show output " | cowsay -f dragon-and-cow | lolcat

 Dragon

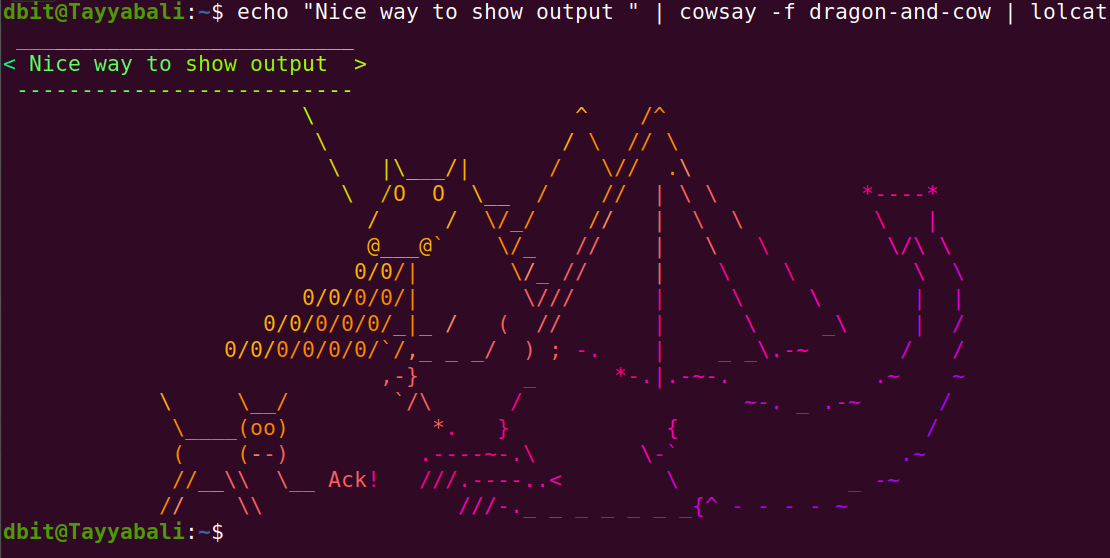
All above examples shows how you can combine the multiple commands and do interesting things. You can use pipe | to combine multiple commands.

clear

Using clear command you can clear the screen content. You can also use Ctl + l to do the same task.

1
dbit@Tayyabali:~$ clear

exit

exit can be used for

  1. to get out of the terminal / exit the session / close the terminal

  2. to exit from the ssh session

  3. to exit from the user login from the command line

1
Examples

dbit@Tayyabali:~$ su root Password: root@Tayyabali:/home/dbit# exit exit dbit@Tayyabali:~$ exit

1
2
3
4

We use ```su``` to switch to root user, it will ask password. Once we are in root login notice the doller sign is changed to ``` # ```

We use the exit to logout from the root user, Next exit will close te session/terminal will be closed

date

Use data in terminal or in shell programming to fetch the date or to calculate arthimatic operations on date

Some of the examples of teh date are given as follows

 1
 2
 3
 4
 5
 6
 7
 8
 9
10
11
12
13
14
dbit@Tayyabali:~$ date
Sunday 20 March 2022 10:36:34 AM IST


dbit@Tayyabali:~$ date --date="2 year ago"
Friday 20 March 2020 10:35:49 AM IST


dbit@Tayyabali:~$ date --date="yesterday"
Saturday 19 March 2022 10:37:21 AM IST


dbit@Tayyabali:~$ date --date="4 days "
Thursday 24 March 2022 10:38:22 AM IST

–> date command will give current date –> date --date="2 year ago" command will give you 2 years previos day –> date --date="yesterday command will disply yesterdays day –> date --date="4 days " Command will display date of next 4 days

uptime

Uptime command gives you information about your system like when it started, how long it is running etc

1
2
dbit@Tayyabali:~$ uptime
16:13:53 up  7:32,  2 users,  load average: 0.79, 0.41, 0.28

As you can see in the above example, first column shows the curent time, second show hw long the system is running in hrs and minutes, 2 users are logged in and system load for the last 1, 5 and 15 minutess

Use -p to print information in pretty format

1
2
dbit@Tayyabali:~$ uptime -p
up 7 hours, 35 minutes

To find out when your system started you can use -s option

1
2
dbit@Tayyabali:~$ uptime -s
2022-02-23 08:40:54

It shows system started at 23rd Feb 2022 and at 8:40:54 am

cal

cal command like date show the entire Calendar

Execute following commands on your system and check the output

1
2
3
4
5
6
7
8
dbit@Tayyabali:~$ cal
   February 2022      
Su Mo Tu We Th Fr Sa  
       1  2  3  4  5  
 6  7  8  9 10 11 12  
13 14 15 16 17 18 19  
20 21 22 23 24 25 26  
27 28 

only cal will print curent months calendar

You can specify month and year or only year also.

1
2
3
4
5
6
7
8
dbit@Tayyabali:~$ cal  March 2022
     March 2022       
Su Mo Tu We Th Fr Sa  
       1  2  3  4  5  
 6  7  8  9 10 11 12  
13 14 15 16 17 18 19  
20 21 22 23 24 25 26  
27 28 29 30 31

tty

Lets see first what tty command gives us

1
2
dbit@Tayyabali:~$ tty
/dev/pts/1

tty is basically teletype which is a standard file name using which we are connected to standard input. If you open another terminal and check it will give you output as /dev/pts/2 which is second file. You can see below as you open more terminals corresponding files are created under /dev/pts directory.

1
2
dbit@Tayyabali:/dev/pts$ ls
0  1  2  3  ptmx

On most of the distribution you can open multiple terminal screen, mostly 6 are supported. You can use following key combinations to login on these termials

1
2
3
4
5
6
CTRL + ALT + F1 – Lockscreen
CTRL + ALT + F2 – Desktop Environment
CTRL + ALT + F3 – TTY3
CTRL + ALT + F4 – TTY4
CTRL + ALT + F5 – TT5
CTRL + ALT + F6 – TTY6

You can switch between these terminals and have simultinous sessions also.

man

man is nothing but mannual help on Linux. Its online help which you can use on terminal.

Syntax is as follows

1
man [options] [section] [command]

Manuanl of Linux system is organised as into following category

1 –> Executable programs or shell commands

2 –> System calls

3 –> Library calls

4 –> Special files

5 –> File formats and conventions, e.g. /etc/passwd

6 –> Games

7 –> Miscellaneous (including macro packages and conventions), e.g.man(7), groff(7)

8 –> System administration commands (usually only for root)

9 –> Kernel routines [Non standard]

You can find all thesse details by using

1
dbit@Tayyabali:~$ man man

LLets try some examples

1
dbit@Tayyabali:~$ man ls

To come out of this mannual you have to simple press q button

Without the any option man will give you full description of the command, its syntax, options and some of the examples of the command.

Lets see other options also

man -k : Display information of commands using pattern search in all sections

man (1..9) command : Display information from the specific section

Lets see example output of above commands

1
2
3
4
5
6
7
8
9
dbit@Tayyabali:~$ man -k echo
echo (1)             - display a line of text
l2ping (1)           - Send L2CAP echo request and receive answer
lessecho (1)         - expand metacharacters
pam_echo (8)         - PAM module for printing text messages
ping (8)             - send ICMP ECHO_REQUEST to network hosts
ping4 (8)            - send ICMP ECHO_REQUEST to network hosts
ping6 (8)            - send ICMP ECHO_REQUEST to network hosts
xmessage (1)         - display a message or query in a window (X-based /bin/echo)
1
2
3
dbit@Tayyabali:~$ man 5 sleep
No manual entry for sleep in section 2
dbit@Tayyabali:~$ man 1 sleep

As you can see above sleep is defined in sectiion 1 so last command will give you some output and tohet will

which

Before we see which command we will see a system envirnmental variable which is PATH.

If we do echo $PATH then we get following paths where the bash will try to

1
2
dbit@Tayyabali:~$ echo $PATH
/home/dbit/.local/bin:/usr/local/sbin:/usr/local/bin:/usr/sbin:/usr/bin:/sbin:/bin:/usr/games:/usr/local/games:/snap/bin

Whatever you see in the output is paths from which the commands also called as binary files will get executed.

Lets see from where the ls and pwd commands gets executed.

1
2
3
4
5
6
dbit@Tayyabali:~$ which ls pwd
/usr/bin/ls
/usr/bin/pwd

dbit@Tayyabali:~$ /usr/bin/pwd
/home/dbit

We can also use full path of the command to execute it.

history

History command is useful to see past executed commands, we can use it with grep command to find the specific commands as shown below

1
dbit@Tayyabali:~$ history | head 

Using above you can see top 10 results from the command history

1
2
3
4
5
6
7
dbit@Tayyabali:~$ history | grep "sudo apt "
  476  sudo apt update
  477  sudo apt upgrade
  480  sudo apt install zsh
  493  sudo apt install zsh
  494  sudo apt autoremove
  495  sudo apt install zsh

Above example is showing searching sudo apt from the history of commands.

1
2
3
4
5
6
dbit@Tayyabali:~$ history 5
 1338  history | more
 1339  history 
 1340  history | grep "sudo apt "
 1341  !
 1342  history 5

You can also see recent 5 commands executed from the history

1
dbit@Tayyabali:~$ 1340!

You can execute the commnd from the history using its event number as shown above, 1340! will execute history | grep "sudo apt " command.

id

id command ins Linux is used to display the ids of user and groupd. In Linux every user has its onw id numbers as shown below. You can specify the options to see ids of specific user or groups also.

 1
 2
 3
 4
 5
 6
 7
 8
 9
10
11
12
13
14
15
16
17
18
19
20
bit@Tayyabali:~$ id
uid=1000(dbit) gid=1000(dbit) groups=1000(dbit),4(adm),24(cdrom),27(sudo),30(dip),46(plugdev),120(lpadmin),132(lxd),133(sambashare),136(libvirt),998(docker)

dbit@Tayyabali:~$ id dbit
uid=1000(dbit) gid=1000(dbit) groups=1000(dbit),4(adm),24(cdrom),27(sudo),30(dip),46(plugdev),120(lpadmin),132(lxd),133(sambashare),136(libvirt),998(docker)

dbit@Tayyabali:~$ id -u dbit
1000

dbit@Tayyabali:~$ id -u ubuntu
1001

dbit@Tayyabali:~$ id -u root
0

dbit@Tayyabali:~$ id -g root
0

dbit@Tayyabali:~$ id -g dbit
1000

As you can see, above, id has given us by default all id user belongs to, you can also specify the user name also using -u or group using -g

pwd

pwd command is used to find out which directory curently you are in

1
2
dbit@Tayyabali:~$ pwd
/home/dbit

whoami

In multiuser envirnment it is possible that many users are logged in on the server so to find out with which user name you have logged in you can use whoami command.

 1
 2
 3
 4
 5
 6
 7
 8
 9
10
11
12
dbit@Tayyabali:~$ whoami
dbit

dbit@Tayyabali:~$ su ubuntu 
Password: 
ubuntu@Tayyabali:/home/dbit$ whoami
ubuntu

ubuntu@Tayyabali:/home/dbit$ su root
Password: 
rroot@Tayyabali:/home/dbit# whoami
root

You can see above when you switch the user to ubuntu whoami will show you your user is changed. Observe for root login also.

ping

Ping command in used to check the connectivty from your system to other system or server.

1
2
3
4
5
6
7
8
ubuntu@Tayyabali:~$ ping www.google.com
PING www.google.com (142.250.192.4) 56(84) bytes of data.
64 bytes from bom12s14-in-f4.1e100.net (142.250.192.4): icmp_seq=1 ttl=120 time=5.93 ms
64 bytes from bom12s14-in-f4.1e100.net (142.250.192.4): icmp_seq=2 ttl=120 time=8.42 ms
^C
--- www.google.com ping statistics ---
2 packets transmitted, 2 received, 0% packet loss, time 1002ms
rtt min/avg/max/mdev = 5.934/7.176/8.419/1.242 ms

You have to use Ctrl + c to stop the running output. AS you can see we have got some response from the google server.

WE have transmitted 2 packets and we received 2 is response. If the server is not up or we are not connected to internet we will have all packets lost as shown below

1
2
dbit@Tayyabali:~$ ping www.google.com
ping: www.google.com: Name or service not known

You can also use -c option to specify how many packets to send and then stop

1
dbit@Tayyabali:~$ ping -c 2 www.google.com

ifconfig

We can use ifconfig to configire or see the details of the network interface details.

 1
 2
 3
 4
 5
 6
 7
 8
 9
10
11
12
13
14
15
16
17
18
19
20
21
22
23
24
25
26
27
28
29
30
31
32
33
34
35
36
37
38
39
40
41
42

dbit@Tayyabali:~$ ifconfig
docker0: flags=4099<UP,BROADCAST,MULTICAST>  mtu 1500
        inet 172.17.0.1  netmask 255.255.0.0  broadcast 172.17.255.255
        ether 02:42:76:ee:3b:5f  txqueuelen 0  (Ethernet)
        RX packets 0  bytes 0 (0.0 B)
        RX errors 0  dropped 0  overruns 0  frame 0
        TX packets 0  bytes 0 (0.0 B)
        TX errors 0  dropped 0 overruns 0  carrier 0  collisions 0

enp4s0: flags=4099<UP,BROADCAST,MULTICAST>  mtu 1500
        ether 84:a9:38:76:f7:a9  txqueuelen 1000  (Ethernet)
        RX packets 0  bytes 0 (0.0 B)
        RX errors 0  dropped 0  overruns 0  frame 0
        TX packets 0  bytes 0 (0.0 B)
        TX errors 0  dropped 0 overruns 0  carrier 0  collisions 0

lo: flags=73<UP,LOOPBACK,RUNNING>  mtu 65536
        inet 127.0.0.1  netmask 255.0.0.0
        inet6 ::1  prefixlen 128  scopeid 0x10<host>
        loop  txqueuelen 1000  (Local Loopback)
        RX packets 2074  bytes 232530 (232.5 KB)
        RX errors 0  dropped 0  overruns 0  frame 0
        TX packets 2074  bytes 232530 (232.5 KB)
        TX errors 0  dropped 0 overruns 0  carrier 0  collisions 0

virbr0: flags=4099<UP,BROADCAST,MULTICAST>  mtu 1500
        inet 192.168.122.1  netmask 255.255.255.0  broadcast 192.168.122.255
        ether 52:54:00:95:c8:20  txqueuelen 1000  (Ethernet)
        RX packets 0  bytes 0 (0.0 B)
        RX errors 0  dropped 0  overruns 0  frame 0
        TX packets 0  bytes 0 (0.0 B)
        TX errors 0  dropped 0 overruns 0  carrier 0  collisions 0

wlp0s20f3: flags=4163<UP,BROADCAST,RUNNING,MULTICAST>  mtu 1500
        inet 192.168.1.103  netmask 255.255.255.0  broadcast 192.168.1.255
        inet6 fe80::bd0f:8a:2f4f:ca39  prefixlen 64  scopeid 0x20<link>
        ether a8:64:f1:b4:6a:22  txqueuelen 1000  (Ethernet)
        RX packets 29150  bytes 24867594 (24.8 MB)
        RX errors 0  dropped 0  overruns 0  frame 0
        TX packets 20552  bytes 4898578 (4.8 MB)
        TX errors 0  dropped 0 overruns 0  carrier 0  collisions 0

AS you can see default ifconfig with no options gives you all network interface details lile. its flags. maximum transsfer units. ipv4 and 6, its mac address etc

You can filter it using name of the interface as shown below

1
dbit@Tayyabali:~$ ifconfig docker0

You can perform folloing with the ifconfig

1
2
3
4
5
6
7
dbit@Tayyabali:~$ ifconfig docker0 up 
SIOCSIFFLAGS: Operation not permitted

dbit@Tayyabali:~$ sudo ifconfig docker0 up 
[sudo] password for dbit: 

dbit@Tayyabali:~$ sudo ifconfig docker0 down

please note You need sudo permission to use above commands

You can change ip address of interface as shown below

 1
 2
 3
 4
 5
 6
 7
 8
 9
10
11
12
13
14
15
16
17
18
dbit@Tayyabali:~$ ifconfig docker0
docker0: flags=4098<BROADCAST,MULTICAST>  mtu 1500
        inet 172.17.0.1  netmask 255.255.0.0  broadcast 172.17.255.255
        ether 02:42:76:ee:3b:5f  txqueuelen 0  (Ethernet)
        RX packets 0  bytes 0 (0.0 B)
        RX errors 0  dropped 0  overruns 0  frame 0
        TX packets 0  bytes 0 (0.0 B)
        TX errors 0  dropped 0 overruns 0  carrier 0  collisions 0

dbit@Tayyabali:~$ sudo ifconfig docker0 192.168.1.10
dbit@Tayyabali:~$ ifconfig docker0
docker0: flags=4099<UP,BROADCAST,MULTICAST>  mtu 1500
        inet 192.168.1.10  netmask 255.255.255.0  broadcast 192.168.1.255
        ether 02:42:76:ee:3b:5f  txqueuelen 0  (Ethernet)
        RX packets 0  bytes 0 (0.0 B)
        RX errors 0  dropped 0  overruns 0  frame 0
        TX packets 0  bytes 0 (0.0 B)
        TX errors 0  dropped 0 overruns 0  carrier 0  collisions 0

Similarly you can also set network mask, brodcast and hardware address as shown below

1
2
dbit@Tayyabali:~$ ifconfig docker0 hw ether AA:BB:CC:DD:EE:FF
dbit@Tayyabali:~$ ifconfig docker0 172.16.25.125 netmask 255.255.255.224 broadcast 172.16.25.63

Note : I have used docker0 interface in the example you can choose any other interface availabe in your system. If you know the concepts of the networking then only change ip and masks otherwise you will mess with your system.

Review Questions

  1. Using echo command display following output
1
2
3
4
5
        Welcome 
                to      
                        the 
                                Linux 
                                        Lab 
  1. Using date command find out day of birthday 5 years ago

  2. Using cal command find out your friends birthday next year.

  3. Using history find out all installation related executed commands in the past

  4. Find out all the users id on a give system